How to Make a Origami Lily Flower Step by Step
Simple Origami Lily Flower Tutorial
![]()
Beautiful Flowers for someone you care about in less then 15 minutes
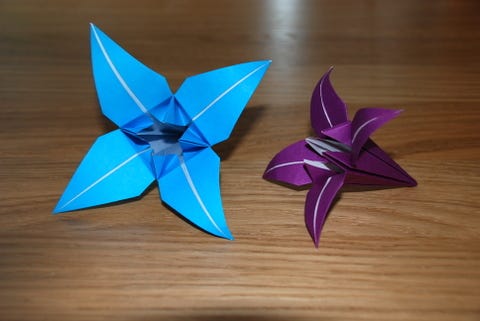
Here is a tutorial for a beautiful flower. The art of Origami can be a very therapeutic passion and one that brings beautiful rewards. This is not an expensive passion to pursue. You can get Origami paper from any good arts and crafts shop. The best thing about these beautiful Origami flowers is, that it takes under 15 minutes flat :)
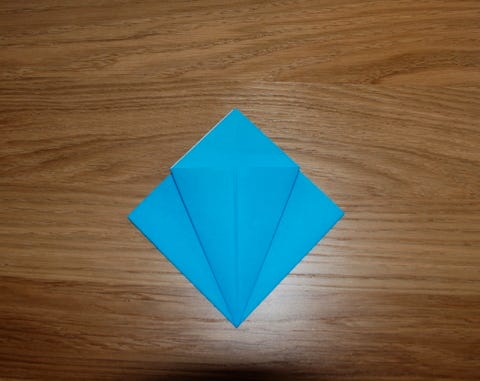
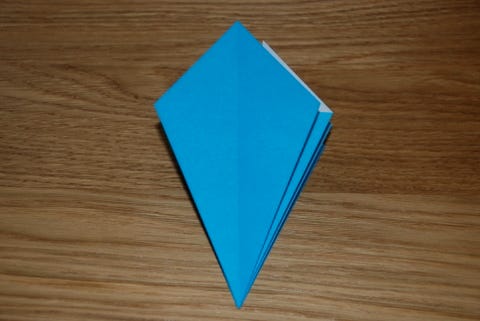
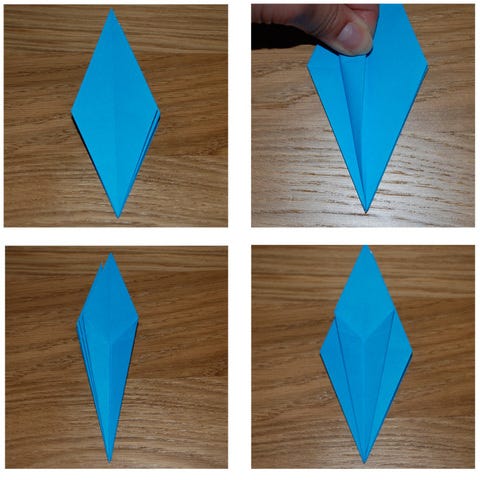
1. Start with a square of p a per — no smaller than 20cm. Fold the paper in half both ways diagonally and horizontally and vertically to make a star as in the pic below. Ensure all of your creases are sharp and precises as possible by running finger nail along each crease for every step of this model.
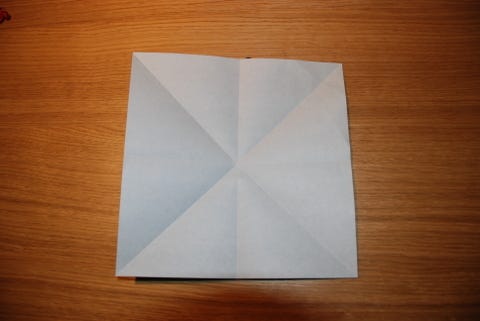
Fold a star shape in the paper. Note how precise the lines are. It's important to take your time in being precise and fussy when folding origami.
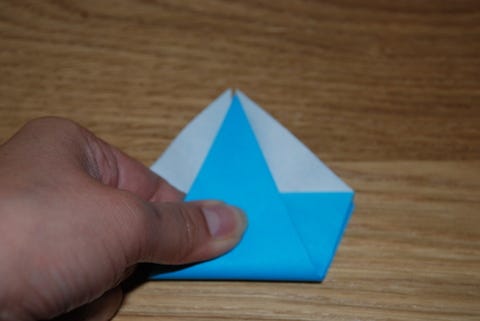
2. Now fold the paper (right side out) into a triangle and using the creaselines as a guide begin to push one of the sides in as shown below…
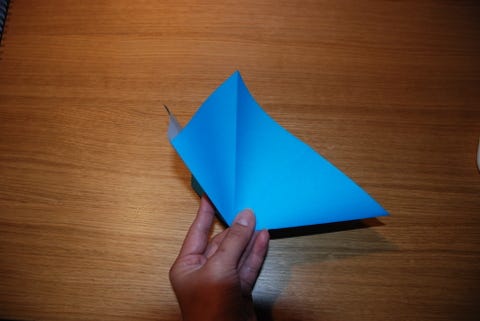
Push one of the sides into the centre of the triangle and repeat with the other side. The result is shown below.

View from top. Push both sides into the centre, this will be the result.
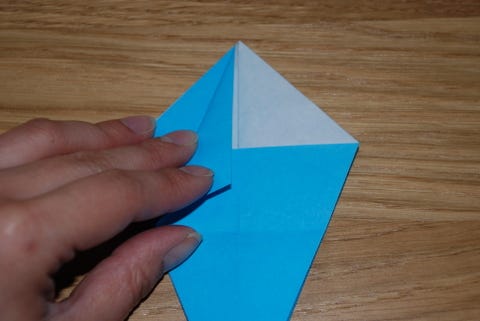
3. Ensure that the open edges of the shape are facing away from you and then take one of the sides and fold into the centre crease line as shown below…
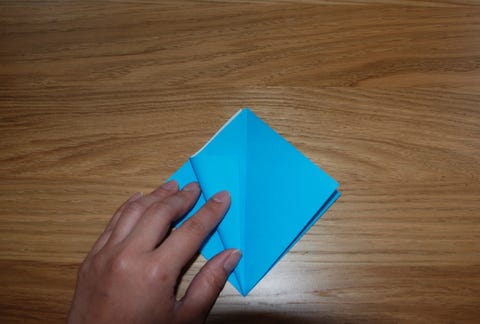
Fold one of the side edges into the center creaseline and repeat with the other side edge and you will get the result shown below…
Now flip the model over, repeat with the other 2 side edges and unfold all of the edges again and you will get the result shown below…

As you can see we have just been making creaselines that will serve as guide for the next step.
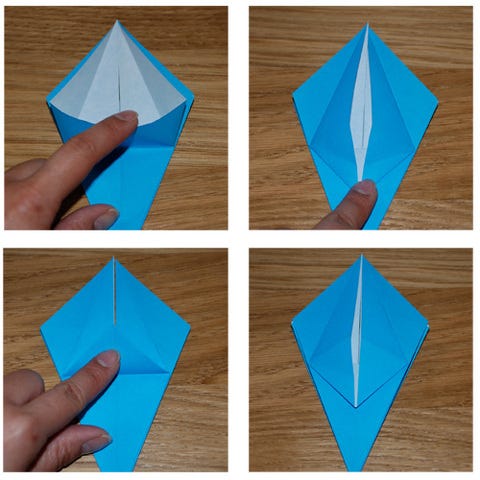
4. Take one of the folded side edges and slip your index finger into it as shown in the pic below…
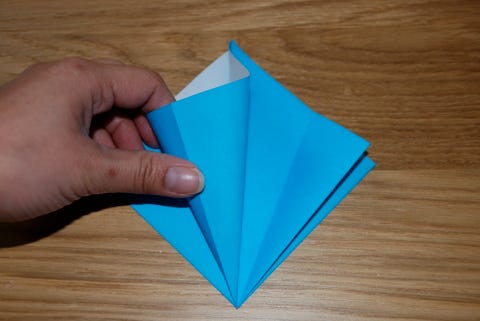
That scar is the result of a small argument (that I lost) with my olfa cutter — we suffer for our art! Slip your finger into the side edge/flap (or whatever you want to call it) and using the creaselines as guide press the flap down so that you get what looks like a kite with a white tip as shown below…
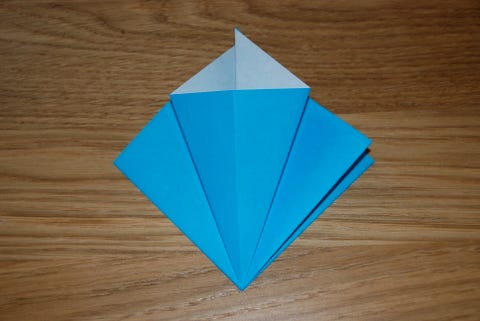
Now repeat the previous step with the other 3 flaps and you will get the result as shown below…
Result. Notice how there are 8 'pages/sides' to the model; some of the 'pages' look like the picture above (with white tip) and other pages look like the pic below…
and others look like this (plain with no white tip) I'm just mentioning the difference in the way the pages look because it's important for the following steps.
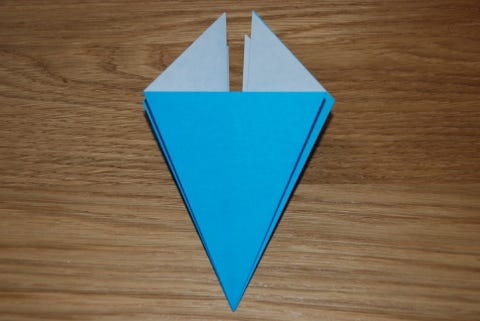
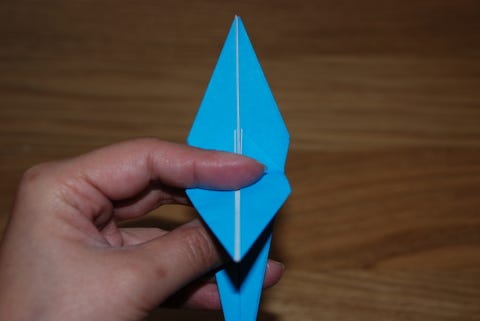
5. Ensure the a 'white tip' page is facing up and fold the shape in half by bringing the bottom tip and the top tip together as shown below…
Fold shape in half and make a sharp crease and unfold. We have just made a crease line for later on.
6. Ensuring you have the kite shape with the white tip facing upwards, take one of the top half side edges and (precisely) fold it into the centre crease line as shown below…
Fold the side edge into the centre crease as shown, repeat with the other side, and open out again and you will get the result as shown below…

Result. As you can see we have made creaselines for a triangle. We are going to use these lines for the next step.
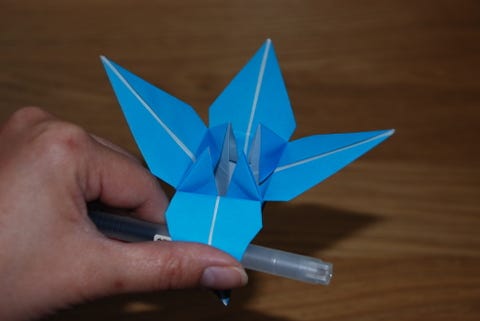
7. Follow the steps CLOCKWISE from top left in the pic below…
Clockwise from top left: slip your finger into the top edge of the pocket (pic 1) and using the side creaslines as a guide pull the lip of it all the way down (pic 2), ensure everything is aligned on the centre creasline (pic 3), push the small resulting triangle upward on the creasline as shown (pic 4).
Repeat the whole of step 7 for the other 3 sides (with white tips).
8. Nearly there! Ensure you have a plain side (with no folds or flaps etc. on it) facing up and the open tip open edges are facing away from you. Follow the steps CLOCKWISE from top left in the pic below…
Clockwise from top left: plain side is facing up and the open tip ends are facing away from you (pic 1), precisely fold one of the side edges into the centre creaseline and repeat with the other side (pic 2), repeat with step with the other 3 PLAIN sides (pic 3), this should be the result (pic 4).
9. Pick up the model with the side facing you (as in pic 4 of the previous step) and pull one of the petals downwards as shown in the pic below…
As you pull the petal down you'll notice it will only go so far downwards, at the point where it will go no further make a crease at the base of the petal. Flip the model over and repeat on the other side. Open out and repeat for the remaining 2 petals.
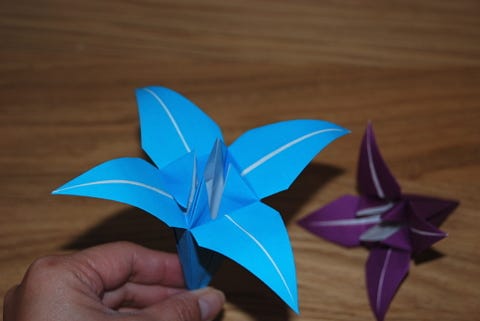
10. Grab a pencil or ruler and curl the edge of the petals to make things even more pretty as shown below.
Curl the petals under with a pencil or ruler and you're done!
We hope you enjoyed creating your beautiful origami flowers! We would love to see how your turned out, so please send us a photo!
Uncover more passions at www.passiondig.com

PassionDig.com
Facebook @passiondig
Instagram @passiondig
Twitter @passiondigger
How to Make a Origami Lily Flower Step by Step
Source: https://medium.com/@Banks1985/simple-origami-lily-flower-tutorial-d24ae03f60e4?source=placement_card_footer_grid---------0-44
0 Response to "How to Make a Origami Lily Flower Step by Step"
Post a Comment