How to Make a Origami Transforming
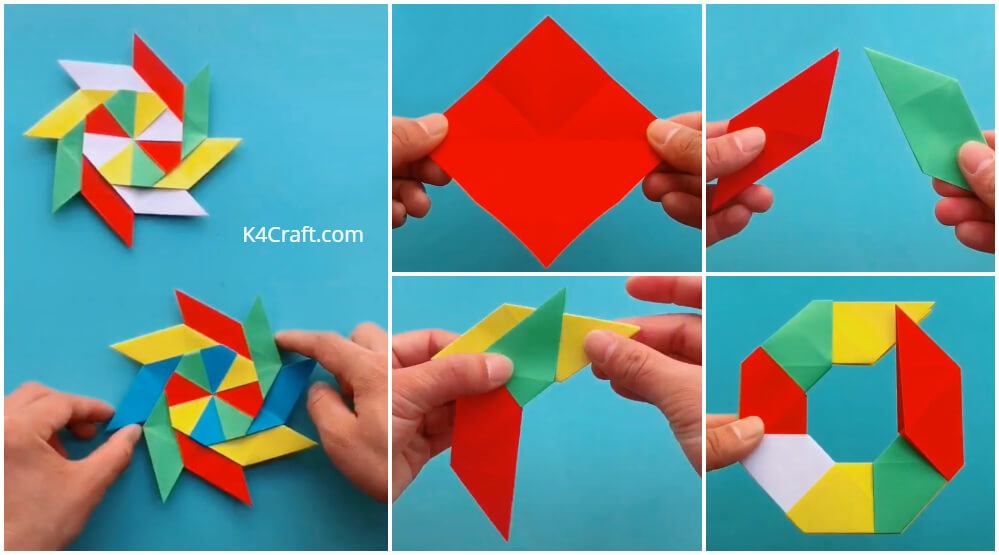
As kids we used to love making origami crafts. They used to be our favorite pastime. In Today's world things have changed a lot. The children are more attracted towards screens and video games which ultimately suck the fun out of activities of craft. We must introduce our kids to the fun of craft. Origami is a great way for kids to begin with crafts.

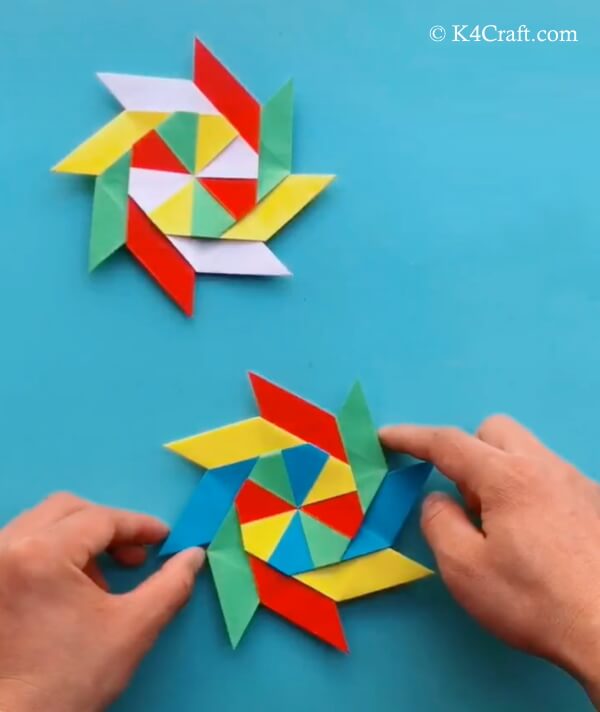
Origami can be learnt easily by a beginner. Your kids will love to make different crafts using origami techniques at home. Holidays are a great time to do such activities with your kids. We have come up with this 8 pointed transforming ninja star for you all. This ninja star is colorful. It can be made easily with some tips and tricks. This ninja star can also be used to play afterwards. So let us begin making this pretty ninja star.
Learn to Make 8 Pointed Transforming Ninja Star
You may like: Handprint Tree Card Craft for Kids – Step by Step Tutorial
Materials Required:
- Colored paper; red, blue, yellow, green
- Scissors
- Glue
Procedure:
✨ Step 1: Starting with the first sheet
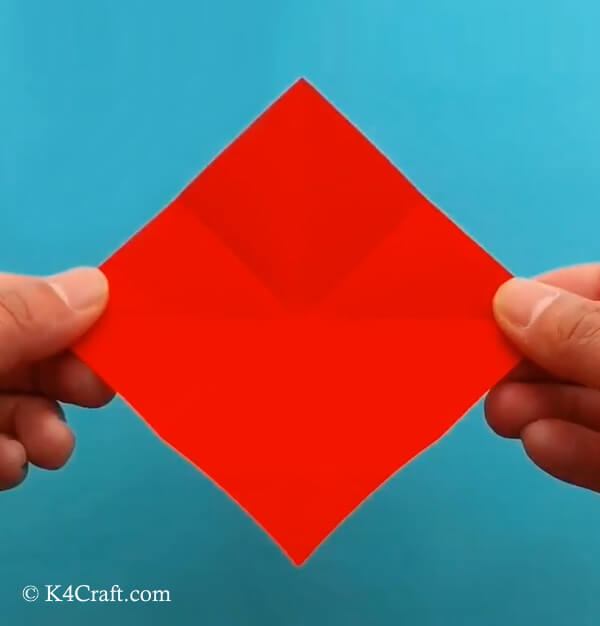
- We will need square sheets of every colored paper.
- The size of the square must be the standard origami sheet which is colored on both sides.
- Now take this square paper and fold it in half from the length sides.
- Now fold this sheet diagonally on both sides.
- This will give rise to creases on the paper which will help us later.
✨ Step 2: Starting to fold
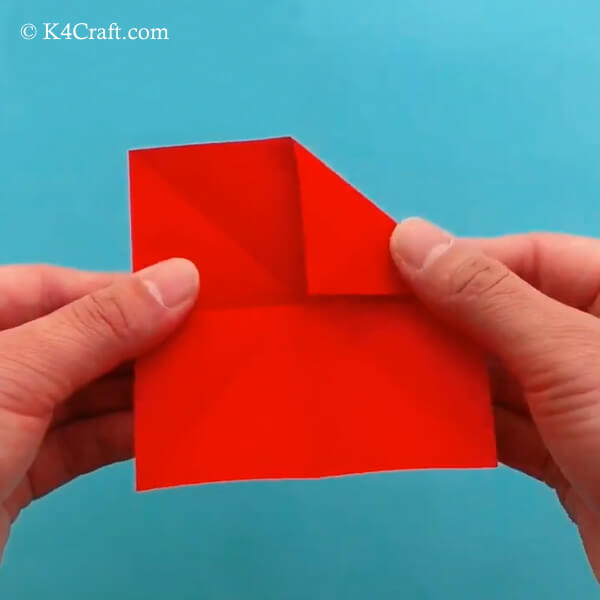
- Now we will be folding along these creases.
- Take a corner of this square paper and fold it inwards to help the corner reach the centre of the sheet.
✨ Step 3: More folds
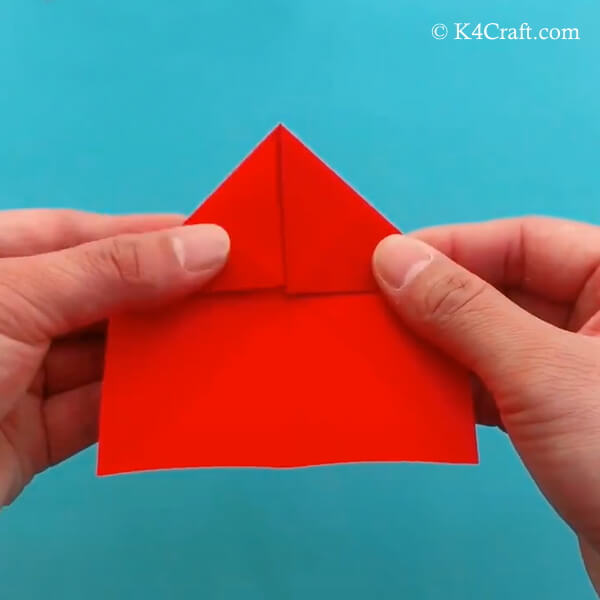
- Now take the adjacent corner and fold it inwards to help the corner meet the centre of the sheet.
- Now we have two corners of the sheet folded inwards.
✨ Step 4: Making some more folds
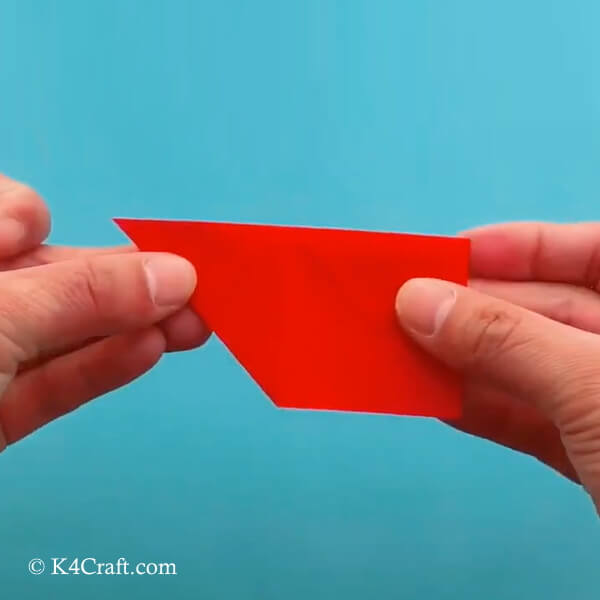
- Now lay the sheet flat with the triangular folds facing upwards.
- Fold this shape inwards.
- In this fold, the triangles will face each other.
- Now you have a slimmer shape in your hand.
✨ Step 5: Pinching in the other end
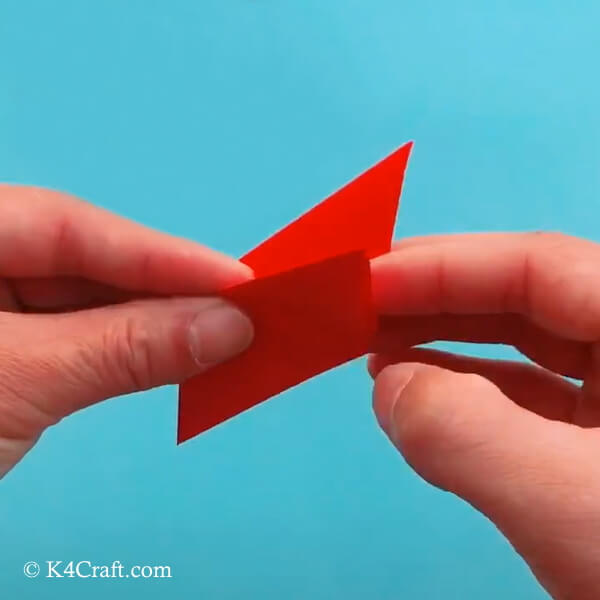
- Now hold this slim shape in your hand.
- Pinch the opposite end from the triangles and pinch it inwards.
- Do it carefully.
- Do not ruin the creases.
✨ Step 6: Make more such shapes
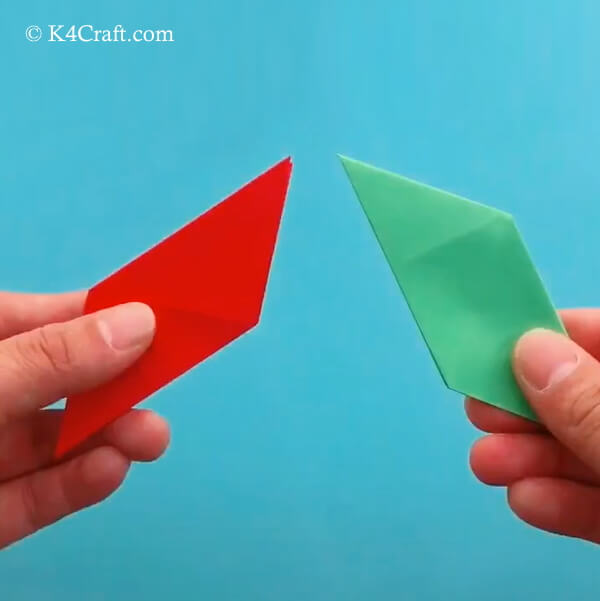
- We have only one such triangle strip from both ends in single color.
- Make more of such strips using different colored paper.
- The different colored paper will add more beauty to this 8 pointed ninja star.
- You can go for contrasting colors to make this ninja star.
✨ Step 7: Joining two strips together
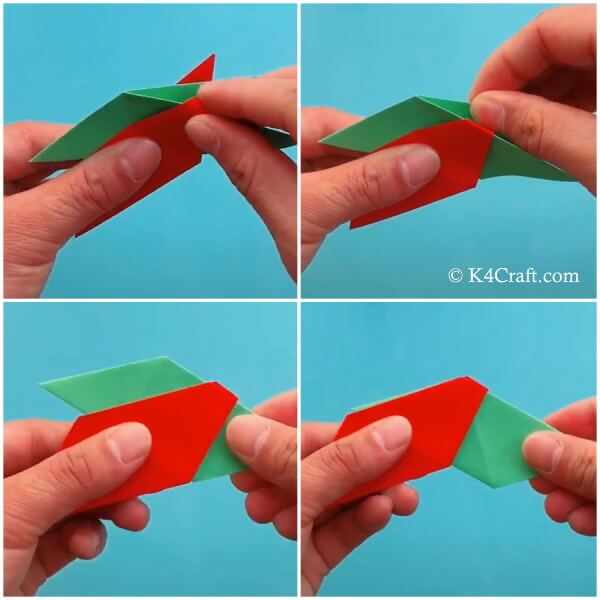
- Now we will be using paper folding to unite the two paper strips.
- Take two different colored paper strips.
- Fix one colored strip inside the triangle leaves of the other strip.
- Now you have two tiny triangle looming at the top.
- Pinch these small flyers into the cavity of the second strip.
- Pull the strips to the top edge of each other.
✨ Step 8: Adding more strips
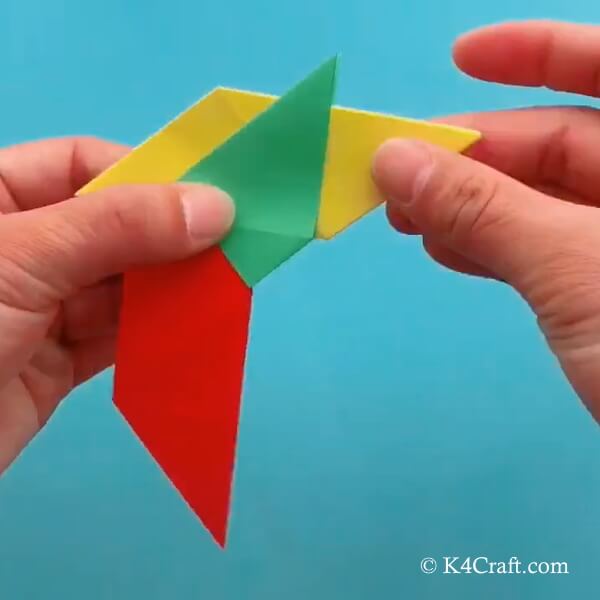
- Now add one more strip to the edge of the second strip.
- Now you will have two flyers on the top of the third strip.
✨ Step 9: Pinching the flyers
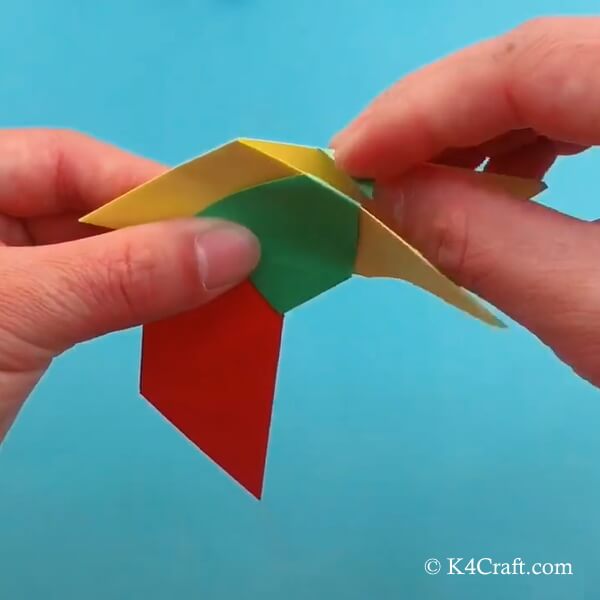
- Now pinch these flyers inside the cavity of the third strip.
- This will secure the second strip to the third and the third to the second.
✨ Step 10: Adding more strips
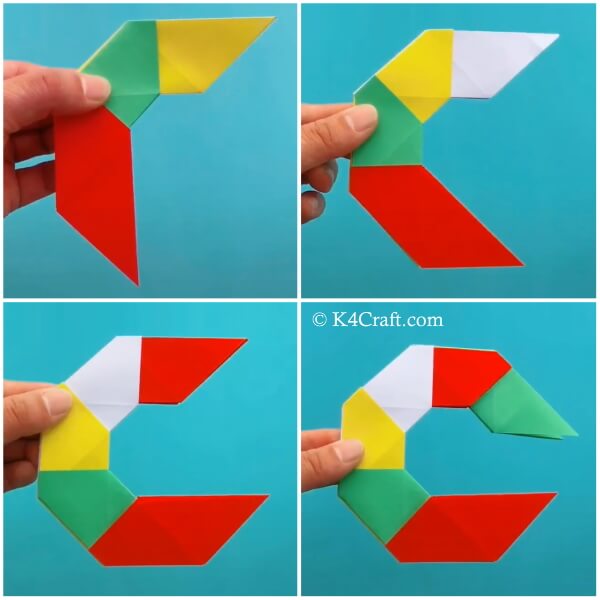
- Now take one more colored strip and add it in front of the third strip.
- Keep on adding more strips to this spiral.
- Make sure you pinch the flyers inwards in a proper manner.
- This ensures that your ninja star does not open up.
✨ Step 11: Completing the loop
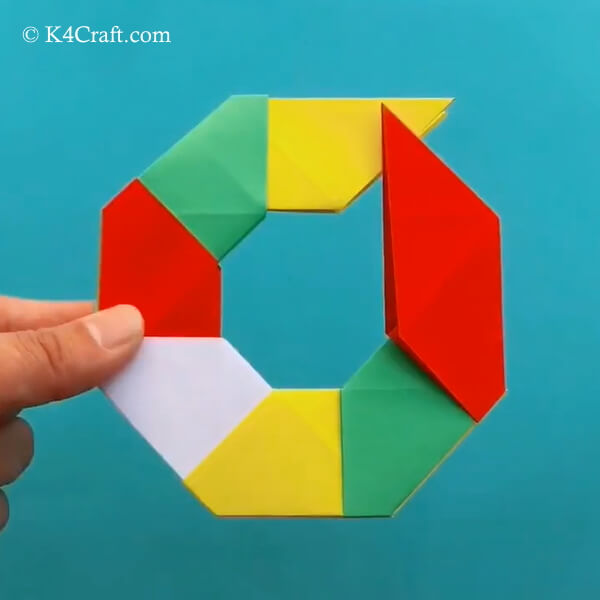
- When you reach the end of the circle, add one more strip.
- Move this new strip to the back of the star.
- This will begin the new layer for the strips.
- Stick the open end to the new layer with the help of glue.
✨ Step 12: Adjusting the strips to shape
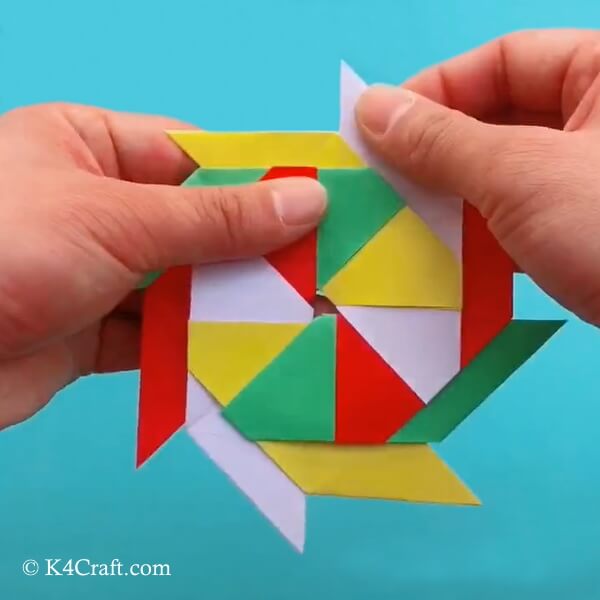
- Now add the strips to this new layer which is formed at the back of the first one.
- This gives rise to the spikes of the ninja star.
- Seal the ends of the ninja star with glue.
✨ Step 13: Final 8 pointed ninja star
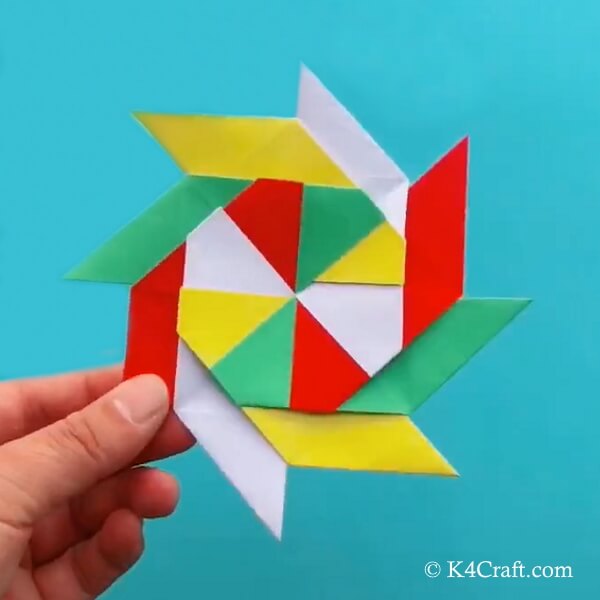
- This is a pretty ninja star craft.
- This ninja star can be used to decorate your home, play with or even for hangings.
- This ninja craft needs some attention on the part of the crafter.
We hope you and your kids had fun making this pretty 8 Pointed Origami ninja star. We also wish that your kids will have fun playing with these stars. These colorful stars will add color to your life. You can check out other such useful articles on K4 Craft. We would love to hear from you. You can share your feedback with us in the comments section given below. We will come up with more such useful content for you. Until then keep smiling and creating with K4 Craft.
You'll also like:
- Paper Caterpillar Craft for Kids – Step by Step Tutorial
- Paper Bird Card Craft for Kids – Step by Step Tutorial
- Paper Rabbit Craft for Kids – Step by Step Tutorial
- Paper Bee Craft for Kids – Step by Step Tutorial
- 70+ Green Colour Day Craft Ideas for Kids
How to Make a Origami Transforming
Source: https://www.k4craft.com/8-pointed-transforming-ninja-star-origami-tutorial/
0 Response to "How to Make a Origami Transforming"
Post a Comment